Resize Image, Compress & Print Size Pro
Simple image resizer, compressor, preview and download tool
🕋 Qilaj Islamic Activity Center
Sirf 1 minute: Qurani Hal, Tasbih ya Islamic Quiz start karein
آپ کی پریشانی کیا ہے؟
📿 33 Tasbih Challenge
33 bar SubhanAllah complete karein
🧠 Islamic Quiz Challenge
- Size
- Compress
- Preview
Online Photo Resizer for Forms – Resize Images Online to Exact Dimensions
Online Photo Resizer for Forms is designed for people who need a practical image result without opening a complicated editing program. In many cases, an image is rejected because its dimensions are incorrect, the file is too large, the format is unsupported, or the photo does not fit properly inside the required upload box.
This online image resizer helps you prepare photographs for application forms, websites, WordPress posts, profile pictures, social media banners, thumbnails, product pages and document uploads. You can select the required width and height, preview the image and download a version that is easier to upload and publish.
Whether you need to resize an image to 512×512, prepare a 240×240 photo, create a 1920×1080 image, or make a large 3000×3000 image, the most important goal is to keep the final picture clear, correctly framed and suitable for its intended platform.
Resize Your Image Online
Upload a clear original image, enter the required dimensions and preview the result before downloading. For the best output, avoid using blurry screenshots, repeatedly compressed WhatsApp images or very small pictures that have already lost detail.
What Is an Online Photo Resizer for Forms?
An online photo resizer for forms is a browser-based tool that changes the width and height of an image so it matches a specific upload requirement. Government portals, school admission forms, job applications, visa systems, profile pages and document websites may ask for an image in exact pixels or within a particular file-size limit.
Instead of repeatedly uploading the same image and receiving an error, you can prepare it before submission. A good image resizing workflow allows you to choose the dimensions, inspect the crop, keep the subject inside the visible frame and save the final file in a commonly accepted format such as JPG, PNG or WebP.
This tool can also be used as a general image resizer for websites and social platforms. It is helpful when a picture looks too large, appears stretched, loads slowly or is automatically cropped in an unattractive way.
What This Image Resizer Helps You Fix
Most image problems do not require advanced design skills. They usually happen because the picture does not match the technical requirement of the destination. An image may be visually attractive but still fail during upload because the width, height, format or file size is incorrect.
- Prepare photos for online application and registration forms.
- Resize pictures for profile pages, ID cards and account avatars.
- Adjust images for WordPress posts and WooCommerce product pages.
- Create suitable dimensions for YouTube, Facebook, Twitter, LinkedIn, Discord and Twitch.
- Reduce unnecessary image weight before uploading to a website.
- Keep several images visually consistent during bulk publishing.
- Prevent faces, logos, products and important text from being cut.
- Convert an image into a more suitable size for mobile and desktop users.
How to Resize an Image Online
You do not need Photoshop or another large desktop program for a simple resizing task. The process can usually be completed in a few steps.
- Choose a clean original image: Start with the sharpest version available. A high-quality original gives the resizer more detail to preserve.
- Upload the image: Select the JPG, JPEG, PNG or WebP file from your phone or computer.
- Enter the required dimensions: Add the width and height requested by the form, website or social platform.
- Select the fitting method: Choose whether the image should fit completely, fill the frame or be cropped to match the exact aspect ratio.
- Preview the result: Check faces, text, logos and important objects before saving.
- Download and rename the file: Use a simple descriptive file name instead of a random camera-generated name.
The final preview is important. A file can have the correct dimensions but still be unsuitable if the main subject has been stretched or cropped incorrectly.
Resize Image to 512×512
The keyword resize image to 512 512 is commonly searched by users preparing square profile photos, application images, icons, product previews and account avatars. A 512×512 image has an equal width and height, which creates a perfect square.
To resize an image to 512×512, choose 512 pixels for both width and height. If the original photograph is rectangular, the tool may need to crop the sides or the top and bottom. Always check whether the face, logo or product remains centered.
When Is a 512×512 Image Useful?
- Profile photographs and account avatars
- Square website icons
- Application and registration portals
- Product thumbnails
- App and directory listings
- Social media profile images
A 512×512 image resizer changes the canvas dimensions, but it cannot restore missing detail from a tiny or blurry source file. For the cleanest result, upload an image that is already close to or larger than 512 pixels.
Resize Image to 240×240
Some portals and profile systems require a smaller square picture. In this situation, you may need to resize an image to 240×240. This dimension is often used for compact profile images, user account pictures, digital directories and small form photographs.
Because 240×240 is relatively small, fine text and tiny visual details may become difficult to read. Keep the subject simple and avoid adding unnecessary borders, decorative text or a busy background.
Tips for a Clear 240×240 Photo
- Use a close-up photo rather than a distant full-body image.
- Keep the face or main product near the center.
- Use good lighting and a clean background.
- Avoid screenshots containing interface buttons or notifications.
- Check the final image on a mobile screen.
Image Resizer 1920×1080 for Full HD Images
A 1920×1080 image resizer is useful for Full HD visuals, presentation backgrounds, video thumbnails, website hero areas and digital display images. The 1920×1080 size uses a 16:9 aspect ratio, which is one of the most common widescreen formats.
When you resize an image to 1920×1080, the original picture should ideally have a similar horizontal shape. A portrait photograph will require heavy cropping to fill a 16:9 frame. If you do not want to crop the subject, you may need to add background space or use the fit option.
Common Uses of 1920×1080 Images
- Full HD desktop wallpapers
- YouTube video backgrounds
- Website banners and hero sections
- Presentation slides
- Digital display graphics
- Video preview images
Selecting 1920×1080 does not automatically improve quality. Enlarging a very small photograph may produce a soft or pixelated result. Use the largest available original file whenever possible.
Resize Image to 3000×3000
A 3000×3000 image resizer creates a large square image that can be useful for high-resolution product artwork, album covers, printable graphics, large marketplace images and detailed social media designs.
Users searching for resize image to 3000×3000 should understand that dimensions and quality are not the same thing. A 500×500 image can technically be enlarged to 3000×3000, but the enlarged file will not contain the same level of detail as an image originally captured at a high resolution.
Before Creating a 3000×3000 Image
- Use a high-resolution source photograph.
- Check whether the destination requires JPG, PNG or another format.
- Confirm the allowed maximum file size.
- Keep important content away from the edges.
- Zoom in and inspect text, lines and product labels.
An image resize 3000×3000 workflow is especially useful when a website asks for large square artwork. However, the final file can be heavy, so compression may still be necessary after resizing.
500×500 Image Resizer
A 500×500 image resizer is suitable for profile pictures, product previews, service listings and square website images. It provides enough space for a clear subject while remaining smaller than a 1000-pixel or 3000-pixel file.
When creating a 500×500 image, use a square crop and place the most important object in the central safe area. This helps prevent the image from looking awkward when a website displays it as a circle or applies additional automatic cropping.
Resize Image to 600×600
Some e-commerce platforms, profile systems and content directories request square images around 600 pixels. You can resize an image to 600×600 when you need a balanced image that is clear enough for normal viewing but not excessively large.
A 600×600 file works well for medium-sized product images, author profiles, team pages and visual listings. Before downloading, confirm that the image has not been stretched. A stretched product photograph can create a misleading appearance and reduce user trust.
1280×720 Image Resizer
A 1280×720 image resizer prepares images in the standard HD 16:9 format. This size is commonly used for video thumbnails, presentation graphics, website previews and media content where a horizontal layout is required.
Compared with 1920×1080, a 1280×720 file is usually lighter and may load faster. It can be a practical choice when Full HD resolution is unnecessary or when the platform automatically displays the image at a smaller size.
Resize Image for YouTube Thumbnail
To resize an image for a YouTube thumbnail, use a horizontal 16:9 layout. A common thumbnail size is 1280×720 pixels. The thumbnail should remain clear when displayed at a small size because many users will first see it on a mobile screen.
Tips for YouTube Thumbnail Images
- Keep the title short and readable.
- Place faces and important objects away from the edges.
- Use a clean focal point instead of too many small elements.
- Check the preview at a reduced size.
- Avoid misleading visuals that do not match the video.
A YouTube thumbnail image should attract attention, but it should also honestly represent the content. Resizing the image correctly prevents automatic cropping and helps maintain a professional channel appearance.
Resize Image to YouTube Banner Size
A user searching for resize image to YouTube banner usually needs a wide channel header that remains readable across televisions, desktop computers, tablets and phones. YouTube banners require special attention because only the central safe area is visible on every device.
A YouTube banner image resizer can prepare the canvas dimensions, but you should still place the channel name, logo and important text near the center. Decorative background elements can extend toward the outer edges.
Resize Image for Facebook Cover Photo
When you resize an image for a Facebook cover photo, remember that desktop and mobile layouts may display the image differently. Important text, faces and logos should be placed inside a central safe zone.
Avoid putting critical information directly at the extreme left, right, top or bottom of the design. Facebook may crop those areas depending on the page type and device. Always open the final page after uploading and check both mobile and desktop previews.
Resize Image for Twitter or X
An image resizer for Twitter, now known as X, can be used for profile images, post graphics and header banners. Each image type has a different layout, so do not use one fixed size for every purpose.
To resize an image for Twitter, first decide whether the image will be used as an avatar, a post image or a profile header. A profile image is usually square but may appear as a circle, while a header requires a wide horizontal design.
Twitter Image Resizing Tips
- Keep profile subjects in the center.
- Do not place important header text near the profile-picture overlap area.
- Preview post images before publishing.
- Use readable text that remains clear on phones.
Resize Image for LinkedIn Banner
You can resize an image for a LinkedIn banner when preparing a professional profile, company page or personal brand header. LinkedIn banners are wide and relatively shallow, which means a normal photograph may need careful cropping.
Keep professional information, service descriptions and logos away from the area covered by the profile picture. A clean banner with one clear message usually performs better than a design filled with many small details.
Resize Image for Discord Emoji
To resize an image for a Discord emoji, start with a simple square image. Emojis appear very small, so fine text, detailed faces and complex backgrounds may become unclear.
Use a single recognizable symbol, expression, object or logo. Transparent PNG files can be useful when you want the emoji to blend naturally with different interface backgrounds.
Image Resizer for Twitch Emotes
An image resizer for Twitch emotes helps creators prepare small square images for channel communities. Since emotes are shown at very small sizes, the design should remain understandable without zooming.
To resize an image for a Twitch emote, use a clear facial expression, bold object or simple channel symbol. Avoid lengthy words and thin lines because they may disappear after resizing.
Resize Image for iPhone Wallpaper
When you resize an image for an iPhone wallpaper, consider the phone model and screen ratio. Wallpaper images are generally vertical, but the exact dimensions vary between devices.
Leave some empty space around the main subject because icons, the clock and interface elements may cover part of the picture. A composition that looks attractive as a normal photo may need repositioning to work properly as a lock-screen wallpaper.
Can You Resize an Image Without Losing Quality?
Users often want to resize an image without losing quality, but every image has limits. Reducing a large image to a smaller size usually produces a clean result because unnecessary pixels are removed. Enlarging a tiny image is more difficult because the software must create additional pixels that were not present in the original file.
You can reduce visible quality loss by following a few practical rules:
- Start with the largest and clearest original image available.
- Avoid repeatedly saving and recompressing the same JPG file.
- Use PNG for graphics that contain transparency or sharp interface elements.
- Use JPG for normal photographs when a smaller file is required.
- Use WebP for websites when broad compatibility and lighter files are important.
- Do not enlarge a small image far beyond its original dimensions.
- Always inspect the final image at 100% zoom.
Understanding Fit, Fill, Stretch and Crop
Fit
Fit keeps the entire image visible inside the selected frame. It may add blank space if the original aspect ratio does not match the target dimensions.
Fill
Fill makes the image cover the complete frame. Some outer areas may be cropped to prevent empty space.
Stretch
Stretch forces the image into the chosen width and height. This can distort faces, circles, products and logos, so it should be used carefully.
Crop
Crop removes part of the image to create the required aspect ratio. Cropping is often the best option for square profile images and horizontal thumbnails, but the focal subject must be positioned correctly.
Best Image Formats for Forms and Websites
JPG or JPEG
JPG is suitable for normal photographs, profile pictures and document images. It usually produces smaller files, but repeated compression may reduce clarity.
PNG
PNG works well for logos, screenshots, text-based graphics and images with transparent backgrounds. PNG files may be larger than JPG photographs.
WebP
WebP is a modern format commonly used for websites. It can provide good visual quality with a relatively small file size, helping improve page-loading performance.
Always check the form instructions before converting an image. Some government, school or company portals accept only JPG or JPEG files.
Quality Checklist Before Downloading
Correct dimensions are only one part of a good image. Before downloading, review the complete result.
- Is the width and height correct?
- Is the file size within the allowed limit?
- Does the image remain clear on a mobile screen?
- Are the face, product and logo fully visible?
- Has any important text been cropped?
- Does the image look stretched?
- Is the selected format accepted by the destination website?
- Is the file name simple and descriptive?
- Does the image accurately represent the page or form?
SEO and WordPress Image Publishing Tips
Resizing an image is also useful for WordPress SEO and website performance. Very large images can slow down a page, especially for mobile visitors. A slower page may reduce engagement and create a poor user experience.
Use a Descriptive File Name
Avoid names such as IMG_20260701_001.jpg or final-new-last-image.png. A clearer name might be:
online-photo-resizer-for-forms.webp
The name should describe the image naturally. Do not add every related keyword to the same filename.
Write Helpful Alt Text
Alt text should explain the image for accessibility and search engines. A useful example is:
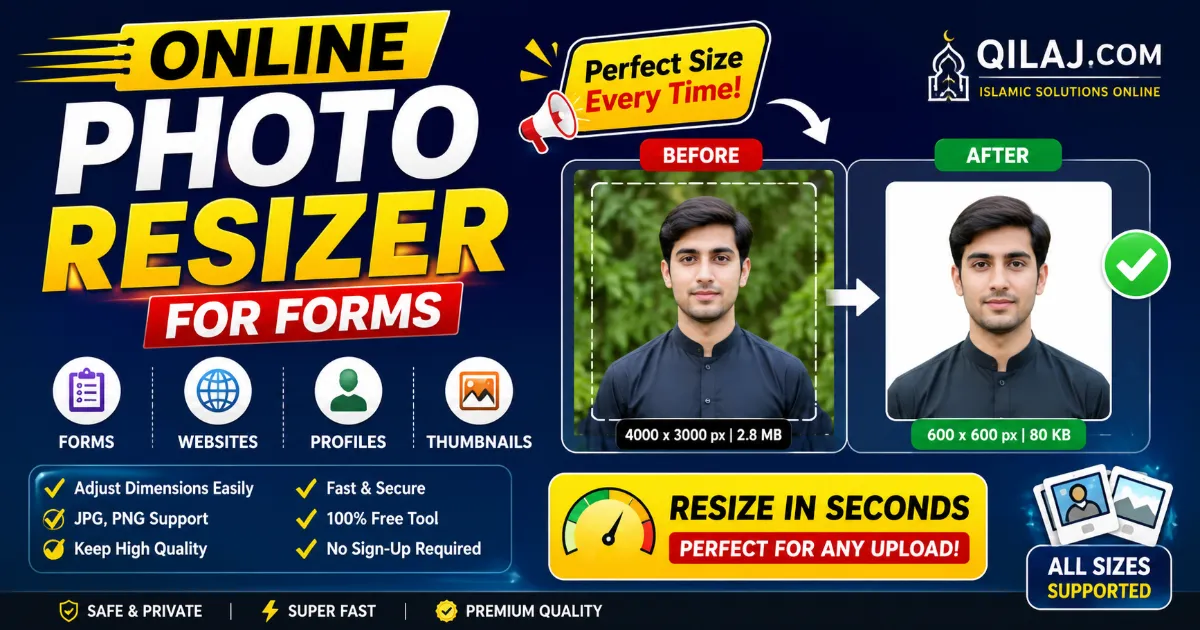
Online photo resizer showing before-and-after image dimensions for form uploads.
Avoid writing a long list such as “image resizer, photo resizer, resize image 512×512, resize photo online.” This looks unnatural and does not help visually impaired users.
Choose the Correct Featured Image Size
For many blog and social sharing layouts, a 1200×630 featured image works well. However, themes and platforms may have different requirements. Check the front-end preview and confirm that the title, logo and main visual remain inside the safe area.
Compress Large Images
Resizing changes dimensions, while compression reduces file weight. A properly sized image can still be too heavy if it contains unnecessary data or is saved at excessive quality.
How This Page Supports Helpful Content
A useful image resizer page should do more than display a shortcode and repeat the same keyword. It should explain what the tool does, when to use it, what dimensions mean, how cropping works and how to check the result.
This guide is built around practical user needs: successful form uploads, accurate dimensions, clearer thumbnails, safer cropping, correct file formats, better WordPress performance and more consistent publishing.
It is also important to be honest about limitations. No online tool can turn a heavily blurred or extremely small image into a perfect high-resolution photograph. The final quality depends on the original picture, the amount of enlargement and the selected format.
Common Image Resizing Mistakes to Avoid
Using a Very Small Original Image
Enlarging a small file to 1920×1080 or 3000×3000 may create pixelation. Start with a larger original whenever possible.
Ignoring the Aspect Ratio
A square image, a YouTube thumbnail and an iPhone wallpaper have different shapes. Forcing one image into every frame can create unwanted stretching or cropping.
Downloading Without Previewing
Always preview the result. The dimensions may be correct while the main subject is partially missing.
Compressing the Same Image Repeatedly
Repeated JPG compression can gradually damage fine details and text. Keep the original file safely stored and create new versions from it.
Using the Same Size for Every Platform
A Facebook cover, YouTube banner, Twitter profile, Twitch emote and WordPress featured image should not all use the same dimensions. Match the image with its exact destination.
Adding Too Much Text
Text that looks readable in a full-sized editor may become unclear in a small thumbnail or profile image. Keep words short and test the final display size.
Who Should Use This Online Image Resizer?
This tool is suitable for beginners, bloggers, students, job applicants, WordPress publishers, affiliate marketers, online sellers, video creators and social media managers.
- Students: Prepare images for admission and examination forms.
- Job applicants: Resize profile photographs for recruitment portals.
- Bloggers: Create consistent featured images and lightweight article graphics.
- Online sellers: Prepare square product images for shops and marketplaces.
- YouTube creators: Resize thumbnails and channel banners.
- Social media managers: Prepare platform-specific profile, post and cover images.
- WordPress website owners: Reduce oversized media and improve image consistency.
Practical Image Publishing Workflow
A clean publishing workflow helps prevent media-library problems and improves consistency across a growing website.
- Select the clearest relevant image.
- Check the destination’s required dimensions.
- Resize or crop the image using the appropriate setting.
- Preview the final version on mobile and desktop.
- Compress the image if the file is unnecessarily heavy.
- Rename it using a clear, lowercase and hyphenated file name.
- Write natural alt text that describes the visual.
- Upload it to the correct post, product, form or profile.
- Open the public page and inspect the final appearance.
This simple process is more reliable than resizing images randomly or using one preset for every website.
Frequently Asked Questions
What is an online photo resizer for forms?
An online photo resizer for forms changes an image’s width and height so it matches the requirements of an application, registration, profile or document-upload portal.
How do I resize an image online?
Upload the image, enter the required width and height, select a fit or crop option, preview the result and download the final file.
Can I resize an image to 512×512?
Yes. Enter 512 pixels for the width and 512 pixels for the height. Because this is a square size, a rectangular image may need cropping.
How can I resize an image to 240×240?
Select a square crop, enter 240 for both dimensions and keep the face or main object inside the center of the frame.
What is a 1920×1080 image used for?
A 1920×1080 image is commonly used for Full HD backgrounds, video visuals, website hero sections, desktop wallpapers and presentation graphics.
Can I resize an image to 3000×3000?
Yes, but a high-resolution original is recommended. Enlarging a small picture to 3000×3000 will not create genuine missing detail.
Does resizing an image reduce quality?
Reducing dimensions usually maintains acceptable quality. Enlarging a very small image may cause softness or pixelation because the original file does not contain enough detail.
Which format is best for online forms?
JPG or JPEG is commonly accepted for photographs, but you should follow the specific instructions provided by the form.
Can I resize an image for a YouTube thumbnail?
Yes. A 1280×720 image with a 16:9 aspect ratio is commonly used for YouTube thumbnails.
Can I resize an image for a Facebook cover photo?
Yes. Use a wide image and keep important text and faces inside the central safe area because Facebook may crop the image differently on mobile and desktop.
Can I use this as an image resizer for Twitter?
Yes. You can prepare profile pictures, post images and wide header graphics, but each image type requires a different layout.
How do I resize an image for a Discord emoji?
Use a simple square image with a clear object or expression. Avoid lengthy text and fine visual details because Discord emojis appear very small.
How do I resize an image for a Twitch emote?
Select a square image, keep the design simple and preview it at a small size to confirm that the expression or symbol remains recognizable.
What is the best image size for a WordPress featured image?
Many websites use 1200×630 for featured images and social sharing, but the ideal size depends on the WordPress theme and layout.
Should I resize or compress an image first?
Resize the image to the required dimensions first, then compress it if the resulting file is still heavier than necessary.
Final Thoughts
Online Photo Resizer for Forms provides a focused way to prepare images for application forms, profiles, websites, social platforms, WordPress posts and document uploads. The correct result is not simply the smallest file or the largest dimensions. A good image should meet the technical requirement while remaining visually clear for the person who sees it.
Start with a clean original image, choose the correct dimensions, use an appropriate crop or fit method and preview the result carefully. Whether you are preparing a 512×512 profile photo, a 240×240 form image, a 1920×1080 background, a 3000×3000 square graphic, a YouTube thumbnail or a Facebook cover, the final check is what prevents cropping, stretching and quality problems.
After downloading, give the file a useful name, add natural alt text and upload it to the correct page. This creates a stronger publishing workflow and helps keep your website, forms and social profiles visually consistent.